Mega Light Tutorial #1
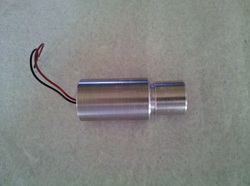
The Mega LED Light is quite unbelievable. The amount of light this puts out is unreal, almost twice a bright as most stock off road motorcycles. Run it right off of your 12v battery with a 2 amp fuse to protect the light.
This light takes no effort to build since the housing was built just for this. The housing is an excellent heat sink and extremely durable. Expect night pictures of this powerful light soon. Weather isn’t ideal just yet but I’ll do my best to brave the temperatures very soon.
This light takes no effort to build since the housing was built just for this. The housing is an excellent heat sink and extremely durable. Expect night pictures of this powerful light soon. Weather isn’t ideal just yet but I’ll do my best to brave the temperatures very soon.
Parts:
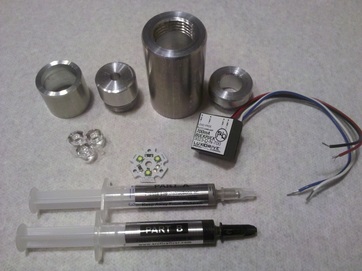
LED / Cree XP-G 3-Up (cool white)
http://ledsupply.com/creexpg-w417.php
Housing / ALK-20M-XX-EH : alk-20m-3up-eh (+ $9.75)
http://www.ledsupply.com/alk-lh-3w.php
Driver / 700ma Wired Buck Puck
http://ledsupply.com/03023-d-n-700.php
Lens / Carclo Spot Optic
http://ledsupply.com/10507.php
Epoxy / Silver Thermal Epoxy
http://ledsupply.com/asta-7g.php
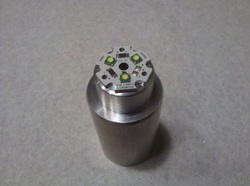
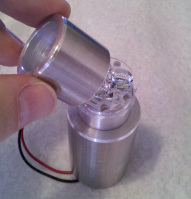
Step 1
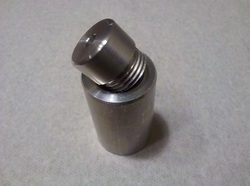
Take the body of the housing (largest piece) and the small piece with the threaded end (the one with the smallest hole) and mix up enough epoxy to cover all the threads. The epoxy makes a secure bond and allows heat to transfer away from the LED.
Step 2
Screw the two pieces together. (Remember there is only about 5 minutes of work time with this epoxy before it sets up but it’s plenty of time.)
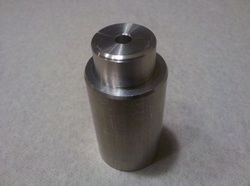
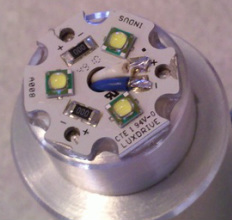
Step 3
Mix up another small batch of epoxy and secure the LED to the housing. Center the LED on the housing as best as you can.
Step 4

On this one the epoxy worked its way into the holes where the optic sits. So I took a small drill bit and with my fingers I twisted the drill bit and cleaned the holes out.
Step 5
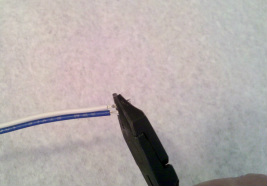
Clip the blue and white wire so only about half the leads are left. The purpose of shortening the leads is because the area on the LED to solder to is very small.
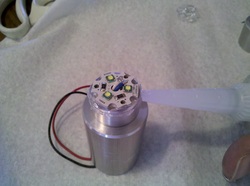
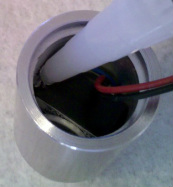
Step 6
Run the white (+) and blue (-) wires up the bottom of the housing and through the hole of the LED. I pre soldered the wires so all I needed to do is heat the wires on the LED board. It made it so I didn’t have to apply additional solder. I held the wires in place with a tiny flat screwdriver while I soldered.
Step 7
Put a bead of silicone around the top just below the LED so when you put the top cap on it makes a nice seal.
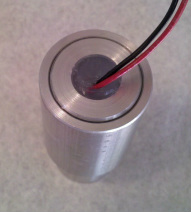
Step 8
Place the optic on the LED and slide the top cap over the optic and LED. Whip off any excess silicone.
Step 9
Place the 700ma Buck Puck driver inside the housing and secure it with a dab of silicone.
Step 10
Silicone the end cap in place with the red (+) and black (-) wire passing through the center. I put the threads on the inside to give it a clean look. Fill the center of the end cap with silicone to seal the inside from dirt and moisture.
Mounting the light
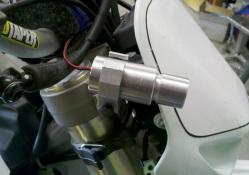
I had a couple aluminum skid plate brackets that should have been thrown out years ago but they came in handy for the mount. The outside diameter of the LED housing is about 1 ¼ inches so the skid plate brackets were almost perfect. With a small amount of bending and slight cutting with a hacksaw I mounted the Mega Light right on the upper triple clamp in just a couple minutes.
I bought a small handle bar On/Off switch and connected it to the 12 volt battery on my bike. It’s important to make sure you use a fuse to protect the light.
I also have a light mounted to the top of my helmet. I used Velcro to secure it (use a lot). It’s nice to have both but one is better than the stock head light anyway.
There you have it. It’s no big deal to be out in the dark. This makes it worth it. Hundreds of dollars cheaper than HID lighting and cheaper than any LED light on the market.
MegaLight
New Thumper Jockey MegaLight
|